You love photography and no one ever said you had aquapobia. You have your camera ready (hopefully, a water proof one or one with underwater housing), you are brimming with excitement and you can’t wait to click your dream photographs underwater! Does this sound like you?
But wait, before you take that dive (both literally and figuratively), we’ve made a list of a few underwater photography tips for you that you should definitely read so the photos you click are elevated to a whole new level!
1. Go Back to the Bay-sics.
Of utmost importance is your ability to dive and swim – and to do it well, for if you have not understood concepts like buoyancy and flotation well enough, it will be difficult for you to take those fabulous pictures that you dream about. Moreover, if your in-water skills are not top class, you might also end up damaging the fragile marine environment around you (bumping into the delicate plants and reefs while trying to control your movements isn’t what you want). Being able to perfectly control your body as well as your camera (and switch settings) underwater is not really an option, but a pure necessity.
Base line, master those skills before you try proper underwater photography.
Experts are of the opinion that if you want to click images underwater, you should be able to dive without using your hands. True, it’s not easy, but the realm underwater offers such breathtaking beauty with dreamlike photo opportunities that we think it’s worth learning.
Also, be sure to not dive in holding your camera system. Always let it be given to you once you’re in the water.
2. Lens do it!
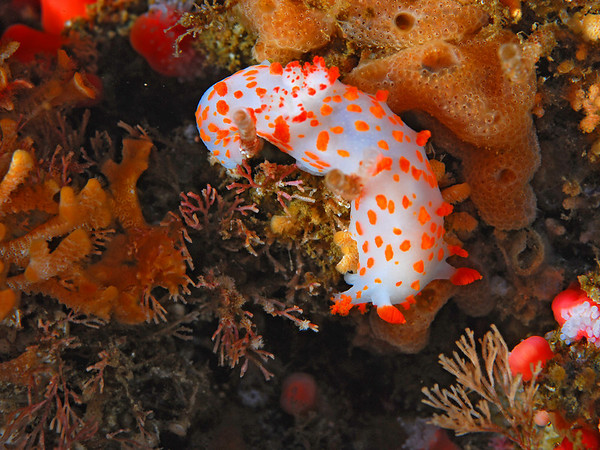
If your budget allows it, a great idea would be to invest in a macro lens or a wide angle lens, depending on the kind of photography that interests you. In layman’s terms (because not everyone was a science nerd back in school), a macro lens lets you magnify your subject so as to fill your full frame, letting you focus on a small part instead of the whole picture. It allows you to capture the intricate details of your subject that would not be visible through a standard lens. Special tip: The best time for macro photography is at night when all the critters are out meandering through the water.
Image Courtesy – UWPhotographyGuide
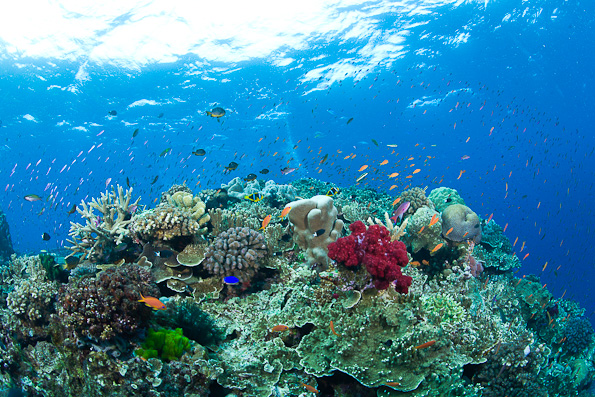
In contrast, a wide angle lens allows you to fit more in your frame than you can with your standard lens. Both the lenses produce very different but equally stunning photographs, but in general, it is more difficult to master the wide angle lens than the macro one.
Image courtesy – UnderwaterCompetition
3. Have proper-ties with water.
Like we mentioned before, not everyone remembers their science lessons, so here’s a quick recap: water absorbs light. 15 feet down, and your reds are mostly gone. Soon after, the yellows and oranges get filtered out. Your photographs, no matter how the view looks through your own eyes, will be washed with blues and greens so flashes and other lighting accessories are a must – they can make or break your photographs. This goes without saying, but don’t forget to use the underwater mode in your camera if it has one.

Without any artificial lighting, this image depicts the loss of the colour spectrum as we go deeper underwater.
Remember that a flash should not be your only or primary source of light, but whenever possible, should aid the ambient source. Also, depending on the depth you’re at, your subjects will also appear larger than they really are, so you must keep that in mind and experiment, experiment, experiment.
Image courtesy – Adorama
4. Let there be light.
Another great tip is to use the ambient light in your favour. You can work with the position of the sun to create magnificent photographs. On a bright day when the sun is high, the water will create gentle, delicate patterns on your subject with light streaming in from above to produce ethereal, dream-like photographs.
Image courtesy – Elena Kalis
During twilight, the effect of the light will be different and will create understated photos washed with faint, subdued light.
Image courtesy – Pop Web Design
Elena Kalis is one photographer who works wonderfully with ambient light whenever possible to create unbelievable images that look like they’re straight out of heaven. You can check out more of her photographs here.
You can try working at night to create dramatic images under the moonlight – but please exercise caution if doing so in the open seas.
Image courtesy – Underwater Photographer of the Year
You can also work with the source of light that you have. A single source of light coming from above can create a spotlight effect, and when paired with the right angle, can take your photograph to a new artistic level.
5. Model it up.
If you want to capture the true spirit of your subject, it is essential to understand your subject as well as the environment around it. Which creatures are dangerous? Which fish are skittish? When are the critters most active? Which species take well to humans – or are friendly? It is said that the best images are created when you’re within a foot of your subject. That said, you should know what to approach at what distance. Being shark lunch isn’t the goal.
If you’re working with models, know that very few have the skill and ability to relax their muscles and appear one with water. Most people can pose for a picture or two underwater, but few can do it convincingly. You’re fortunate if you know someone who’s comfortable in water for long durations.
It is also always better to shoot with a model in shallow waters as you can easily resurface for breath. If you’re not blessed with those kind of natural surroundings, you can always try a swimming pool!
6. Look prim and ‘prop’er.
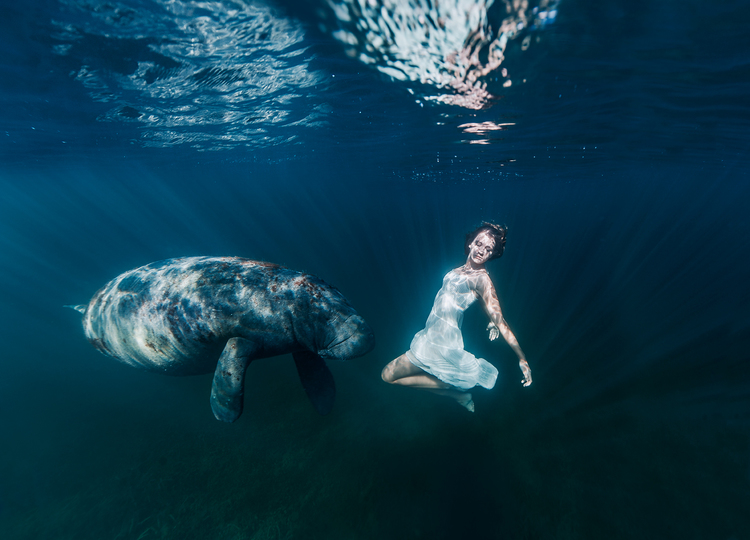
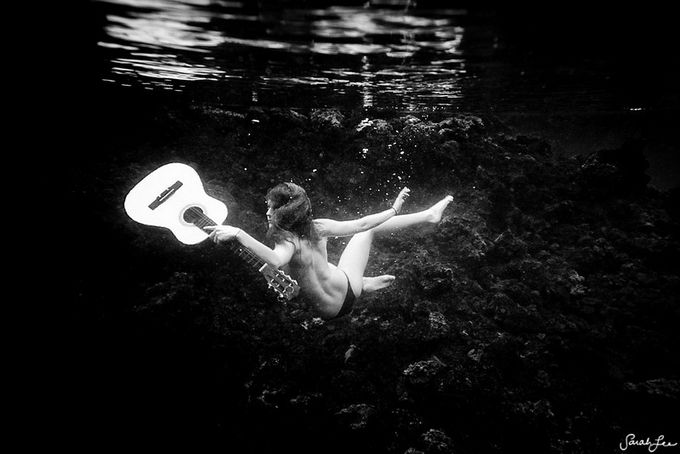
Props and accessories also play a significant role in the kind of photographs you want to create, especially when you’re using a model. As long as it can stay underwater, you can use it as part of your composition.
Image courtesy – Sarah Lee
Mermaid tails, floral crowns, flowers, mirrors, balloons, even musical instruments – the possibilities are endless! No, we’re not talking giant pianos; maybe your model holding a violin or a flute in a long flowing dress or an exquisite gown can make for a really good shot!
You can also combine accessories and clothes to recreate scenes from films, plays or books underwater. A great inspiration would again be Kalis, who has shot several pictures with her daughter to recreate scenes from well-known fairy tales and stories, all underwater!
Image courtesy – Elena Kalis
Every great artist normally has one thing they usually employ in their photographs which sets them apart from the rest, enabling them to create their own unique identity. Why not try that? Your only limit is your imagination!
7. Testing the Waters.
While we’re talking about props and models, another great tip is to first practice in a pool before surrounding yourself with marine life. It’s a manmade water unit where a lot is in your control, not to forget it’s much safer. It’ll also help you decide which props to use and which to avoid.
As a rule, you should always immerse your camera in freshwater before taking it out elsewhere. If bubbles form, it should be an alarm for you to check for leaks. Yes, cameras do not take well to water inside them, but trust us, you’re better off with a freshwater leak than a saltwater one.
8. ‘Scale’ it up.
It’s often difficult to depict the size of objects underwater, so a great idea is to keep another object in your composition along with your subject. Photographing a shipwreck? Why not try to add a whale or a dolphin to your composition, if possible? Capturing a school of fish on your camera? Add a diver in your frame!
Image courtesy – Underwater Photographer of the Year
By doing so, viewers of your photograph can judge the true size of your subject. An added bonus: It often makes your otherwise somewhat monotonous photograph more interesting.
9. Oh, The ‘Angle’ular Side.
The angle at which you shoot is as important as your subject. Try going low and then shooting upwards instead of shooting downwards; you can also make use of the dramatic patterns caused by the sunlight on the water that way.
Image courtesy – National Geographic
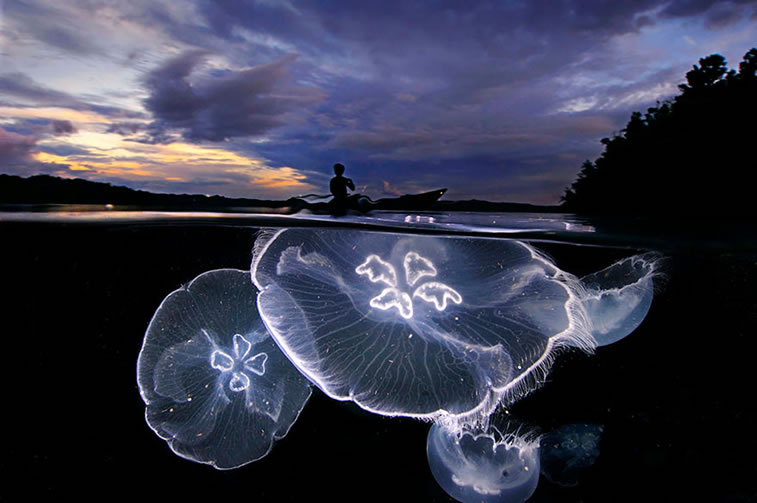
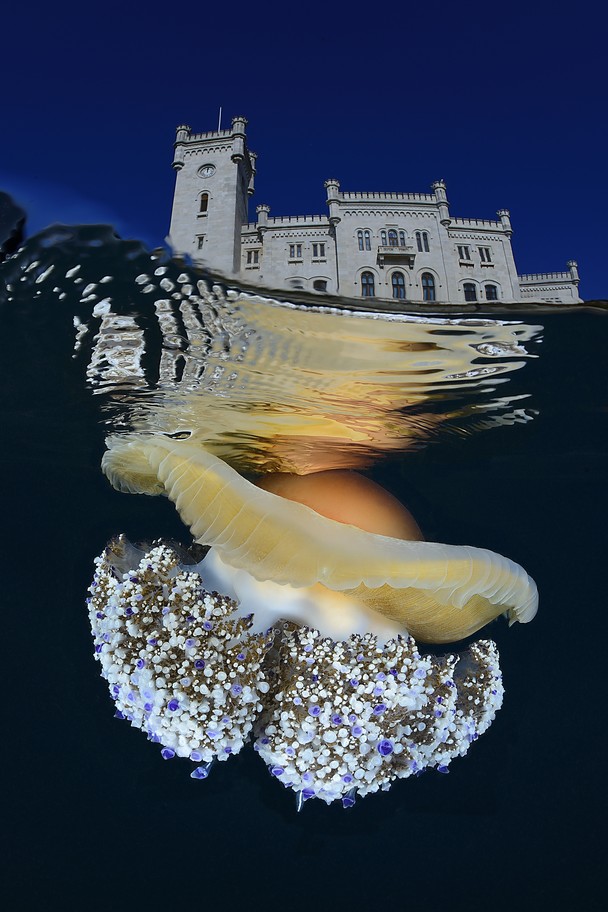
Just because you’re shooting underwater and not on land doesn’t mean the basic rules of composition change. Use the rule of thirds or try incorporating a frame within a frame. Why not split your picture into half? In that manner, you can capture the best of both worlds – the skies in the upper half and the marine world in the lower. They’re like the two ends of the scale – the serene land above and the chaotic life below often perfectly illustrate the amazing juxtaposition of the two worlds. During post processing, if the colours seem to be gently mingling with the other, you can try turning the picture upside down to create something that is creative, fun and unique.
Image courtesy – Pop Web Design
Also, remember what we said about the colour spectrum underwater? The same holds true for skin tones. It’s best to keep within one to five feet of the water surface if you want to capture that perfect image of your models.
10. ‘Fin’ish it off with a splash!
Of course, you don’t always need to edit your photos after you’ve clicked them but you can try enhancing the colours in your image for a vibrant, vivid photograph.
Don’t forget to crop your photos to ensure that the focus is where you want it.
Another great tip is to convert your images to black and white, especially when the colours aren’t precisely the way you had imagined them to be. This is especially useful for photographs of your models, where the skin tone is of paramount importance.
Image courtesy – Sarah Lee
If you’re serious about post processing, it’s always better to click your images in RAW format. Keep in mind that they occupy much, much more space per photograph than JPEG files (my own DSLR’s RAW image files are 40-45mb each in contrast to the 10-20mb JPEG images) so it’s imperative to have an SD card.
But at the end of the day, it’s your passion that really matters. There will be times when nothing goes right – you will be inspired and eager to impress even Poseidon but he will not share your feelings, you’ll bring a certain type of lens just to find out that you don’t need it, you’ll click photographs that you think are dazzling but will be a waste of space, you’ll be so mesmerised with the life in the ocean that you will forget to take a picture till the creature is gone. It is what the underwater kingdom does to you. It’s happened to all photographers, right from the amateurs to the award winning ones, so know it’s perfectly alright to make mistakes. You’ll need to laugh it off and start afresh another day. Life in the oceans is as spectacular as it is fascinating; it is like transporting yourself to another planet altogether, largely unknown to man, and being one with the seas, even if it’s for a brief amount of time, is a humbling experience in itself.


